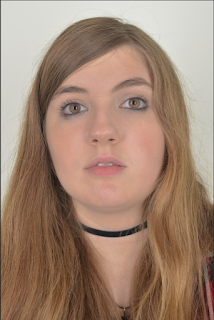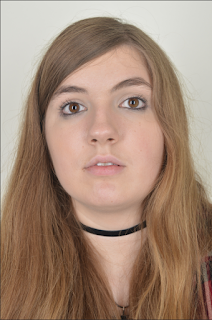

In the photo on the right I have applied a soft focus to the photo to the retouch the skin of the model
Below are the step for how to do this
1.
Open photo
2.
Image – Mode – CMYK Colour – Ok -
3.
Channels – Yellow
4.
CMD- A
5.
CMD- C
6.
Go back to layer
7.
CMD-Z to original image
8.
CMD-V
9.
Rename Layer Flaws
10. CMD-I
11. Blending mode to soft light
12. Press alt-K and then circle in rectangle at
bottom of screen
13. Select a soft brush
14. Adjust Opacity
15. Apply to Image make sure the colour is set to
white
the spot healing tool to get rid of blemishes and imperfections
Below are the steps on how to do this.
1.
Open
Image
2.
Alt-J
to duplicate layer
3.
Rename
Layer – Blemishes
4.
Select
the spot healing tool
5.
Apply
to blemishes and
imperfections
Here is the photo with both these effect applied
I really like the effects that these had on the picture. I like that it changed the eye colour and that the effect that it has had on the face. I like that it made the skin equal and look soft. I like the editing on the face as it doesn't look fact but you can tell that it has been edited. The processes look very difficult however once you have got the hang of them they are easy and are very quick to apply. Originally I didn't like the idea of doing this process but after seeing how well it worked I feel like it will work better with some of my photos.


No comments:
Post a Comment